Notes:
- This recipe takes a total of 2 days to complete and requires plenty of fridge space overnight.
- It is best to go based on weight as the amount of flour and starter can vary per-cup measurement.
- It is very very very sticky and messy.
- It is best to use the sourdough starter about 4-5 hours after last feeding it.
- I recommend watching a video to get the basic steps visualized before trying it.
Ingredients:
- Sourdough Starter – 225 grams (1 cup mature)
- Flour Mixture – 950 grams (About 5-6 cups depending on humidity)
- I use a mix of mostly all-purpose flour mixed with Bread flour and whole wheat flour. I slightly change the ratio of types with each bake.
- Example: 3 cups all-purpose, 1 cup bread flour and 1 cup whole wheat flour.
- Warm Water – 660 grams (2 and ¾ cups)
- Salt – 18 grams (1 Tablespoon)
- Rice flour – enough to dust the bowls
Steps:
- In a large mixing bowl, mix the raw flour in with the water until a well-mixed dough forms. Let sit covered for an hour before adding the mature sourdough starter. Letting the flour sit allows the dough to relax and form gluten.
- After letting the dough sit for at least an hour, sprinkle the salt over the top of the dough.
- Pour the sourdough starter over the salt and dough and poke and pinch it in to the dough. Fold the dough together to thoroughly combine the salt, dough, and sourdough starter.
- Cover the mixture and let sit for 15 minutes.
- If cold day let sit 30 minutes between each of the next steps.
- Open the cover and use a wet hand to pull the dough up from each side and stretch it in to the center of the dough ball until all sides have been pulled.
- Cover the mixture and let sit for 15 minutes.
- Repeat the dough pulling process.
- Cover the mixture and let sit for 15 minutes.
- Repeat the dough pulling process.
- Cover the mixture and let sit for 30 minutes.
- Repeat the dough pulling process.
- Cover the mixture and let sit for 30 minutes.
- Repeat the dough pulling process.
- Cover the mixture and let sit for 30 minutes.
- Repeat the dough pulling process.
- Cover the mixture and let sit for the final 30 minutes.
- The dough should now have some bubbles formed, carefully pour it out on to an unfloured, non-oiled surface. You can use a scraper to gently release the dough from the sides of the bowl.
- Take some flour and create a line down the center of the dough mass to approximately split in to two separate dough masses.
- Use a bench scraper to twist the under-side of the dough slightly in to tighter dough masses. (Without video this is difficult to explain). Repeat for each of the 2 dough balls.
- Let the dough sit out in the open air and rest for 15-30 minutes. This will slightly dry out the sticky surface and will relax the dough.
- Dust the top side of the dough with all-purpose flour. Flip the dough over so the flour side is down. The exposed part should still be wet and sticky. Pull each of the four side up and to the center and put the wet sides of the dough together. This happens in 4 parts and is easier to see in videos. When complete all exposed parts of flour should have a slight dusting, and all wet sticky parts of dough should have been folded-in on each other.
- Flip the dough over so that the seams that were just created are down toward the work surface.
- Use the Bench scraper or your hands to again pull and twist the bottom of the dough to a tighter seam, pulling the dough in to a tight ball.
- Dust a bowl or banneton with rice flour.
- Flip the dough top side down in to a bowl and cover it. If airtight, you can place in the fridge. If not, cover with plastic wrap or a zip lock so the dough does not dry out, then place them in the fridge.
- Repeat for the second dough mass.
- Leave both in fridge overnight to slowly ferment and develop flavor.
- After about 13 hours in the fridge, preheat the oven. Place the dutch-oven in the oven with its lid and preheat to 500 degrees for an hour. You want the dutch-oven thoroughly hot when the bread in placed in it.
- Once pre-heated, take the dough from the fridge and flip it out of the bowl on to a floured surface. At this time, you can score the dough up to ¼ inch deep in whatever pattern you wish.
- Sprinkle a little flour in to the bottom of the dutch-oven and place the dough in. Put the lid on and place in to the oven.
- Bake at 500 for 20 minutes.
- After 20 minutes remove lid, and lower temperature to 475 for an additional 25-30 minutes.
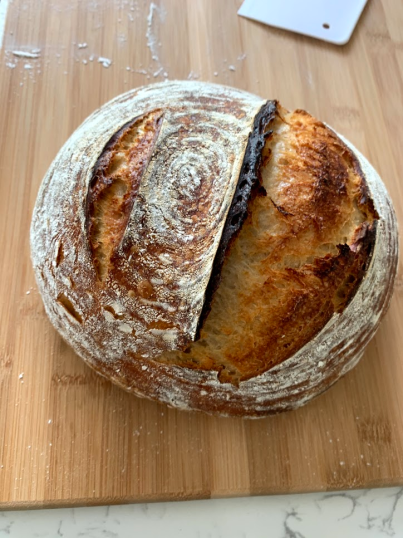
- Remove the bread when golden-brown.
- Repeat for the other dough mass.